
Monitoring water usage with Shelly and Home Assistant
Ever wonder how much water you use having a bath versus a shower? What about how much the washing machine uses or the dish washer? Luckily there’s a lot of different options available for people to buy - however they’re not cheap and may not always fit your specific needs. Some fit inline onto the water pipe, others clip onto the meter and report over a wireless signal.
For myself I had some things in mind:
- Didn’t want to fluff around with batteries
- Nothing inline that I’d potentially need a plumber for or would have to replace if I ever moved
- As I’m just measuring water, I also didn’t want to pay too much
I had an existing water fountain that we didn’t use anymore that ran power from our garage to our patio so I thought, why not just rerun the line to the front of my house and see what we can do.
It had to be cheap, reliable and safe.
It turns out that it’s not that hard to do-it-yourself - say hello to the capable Shelly Uni and induction sensor.
Induction sensor
My water meter is not smart, it’s old school where a metal disc spins around as water is travels through the meter. Hence, our only options are placing something inline which can then report usage or watch the disc spin around, I chose the later.
An induction sensor is perfect for this task. The sensor produces a magenetic field and when it comes into contact which something like a metal object (or a disc), it disrupts this field and will cause a change in the sensor’s output.
There are two main types, PNP and NPN. I’ll leave it to the reader to Google it, but essentially the difference is that a PNP sensor will produce a positive output when “ON” and the NPN sensor will produce a negative output. I selected a PNP NO sensor, which means a positive signal and Normally Open - until the sensor comes into contact with a metal object there is no voltage hence the normally open. On contact whatever is reading the signal will then recieve about 12V.
Specifically I chose (PNP NO 3 wire): AliExpress
I also went with the M18 with an increased detection distance of 8mm. The glass on the top of my water meter is actually quite thick, and I’ve found that with the better detection distance has given me more solid detection results.
A final note: the hole in the ground where my water meter is located likes to flood. It seems that for water reason the water table will rise and so I’ve had to account for that and selected at least a IP67 water rated sensor. It only just submerges and very rarely, so time will tell how well it stands to the elements.
Here is the sensor installed:
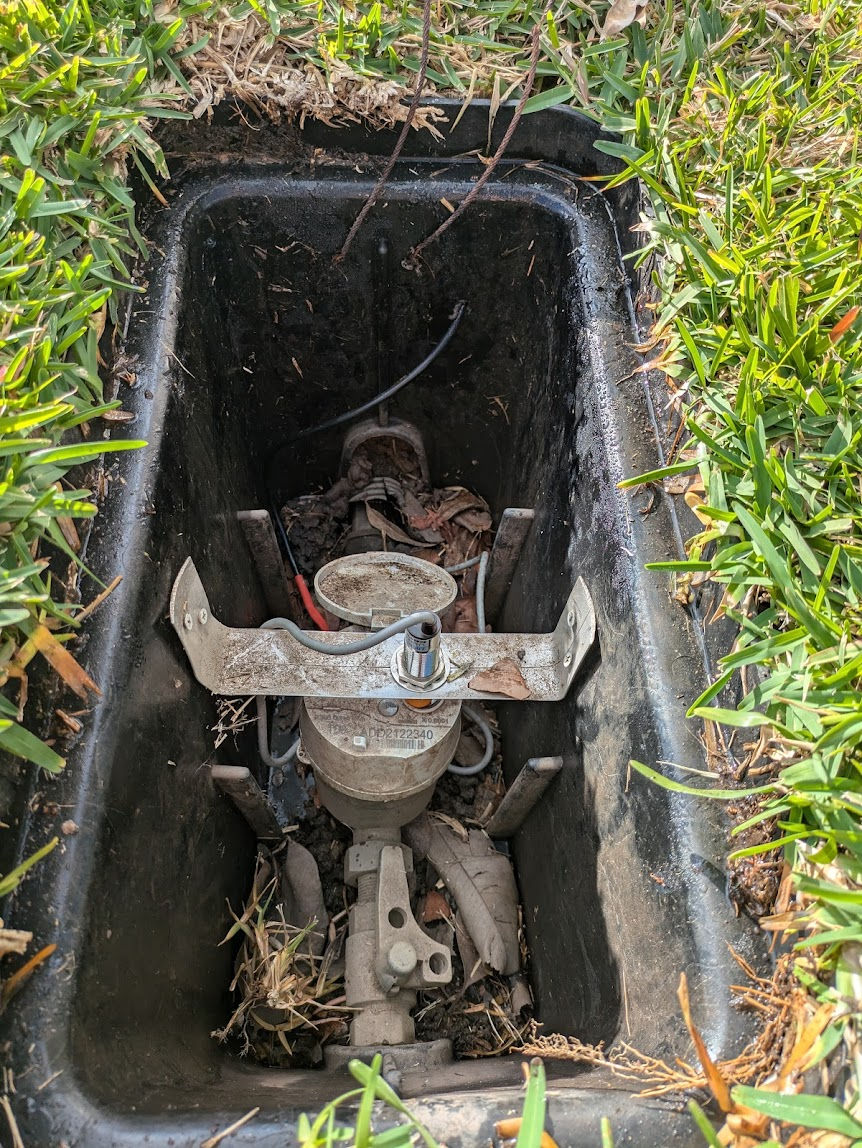
A piece of aluminium for $4 at the local hardware store provides more than enough stability here to hold the sensor flush against the glass and upright. Looks DIY enough for me.
Shelly Uni
The Shelly Uni is a small Wi-Fi connected device that controls sensors and can also also receive digital/analogue input, which is perfect for out application especially when coupled with an induction sensor.
The actual unit itself is only small, 20mm x 33mm x 13mm:
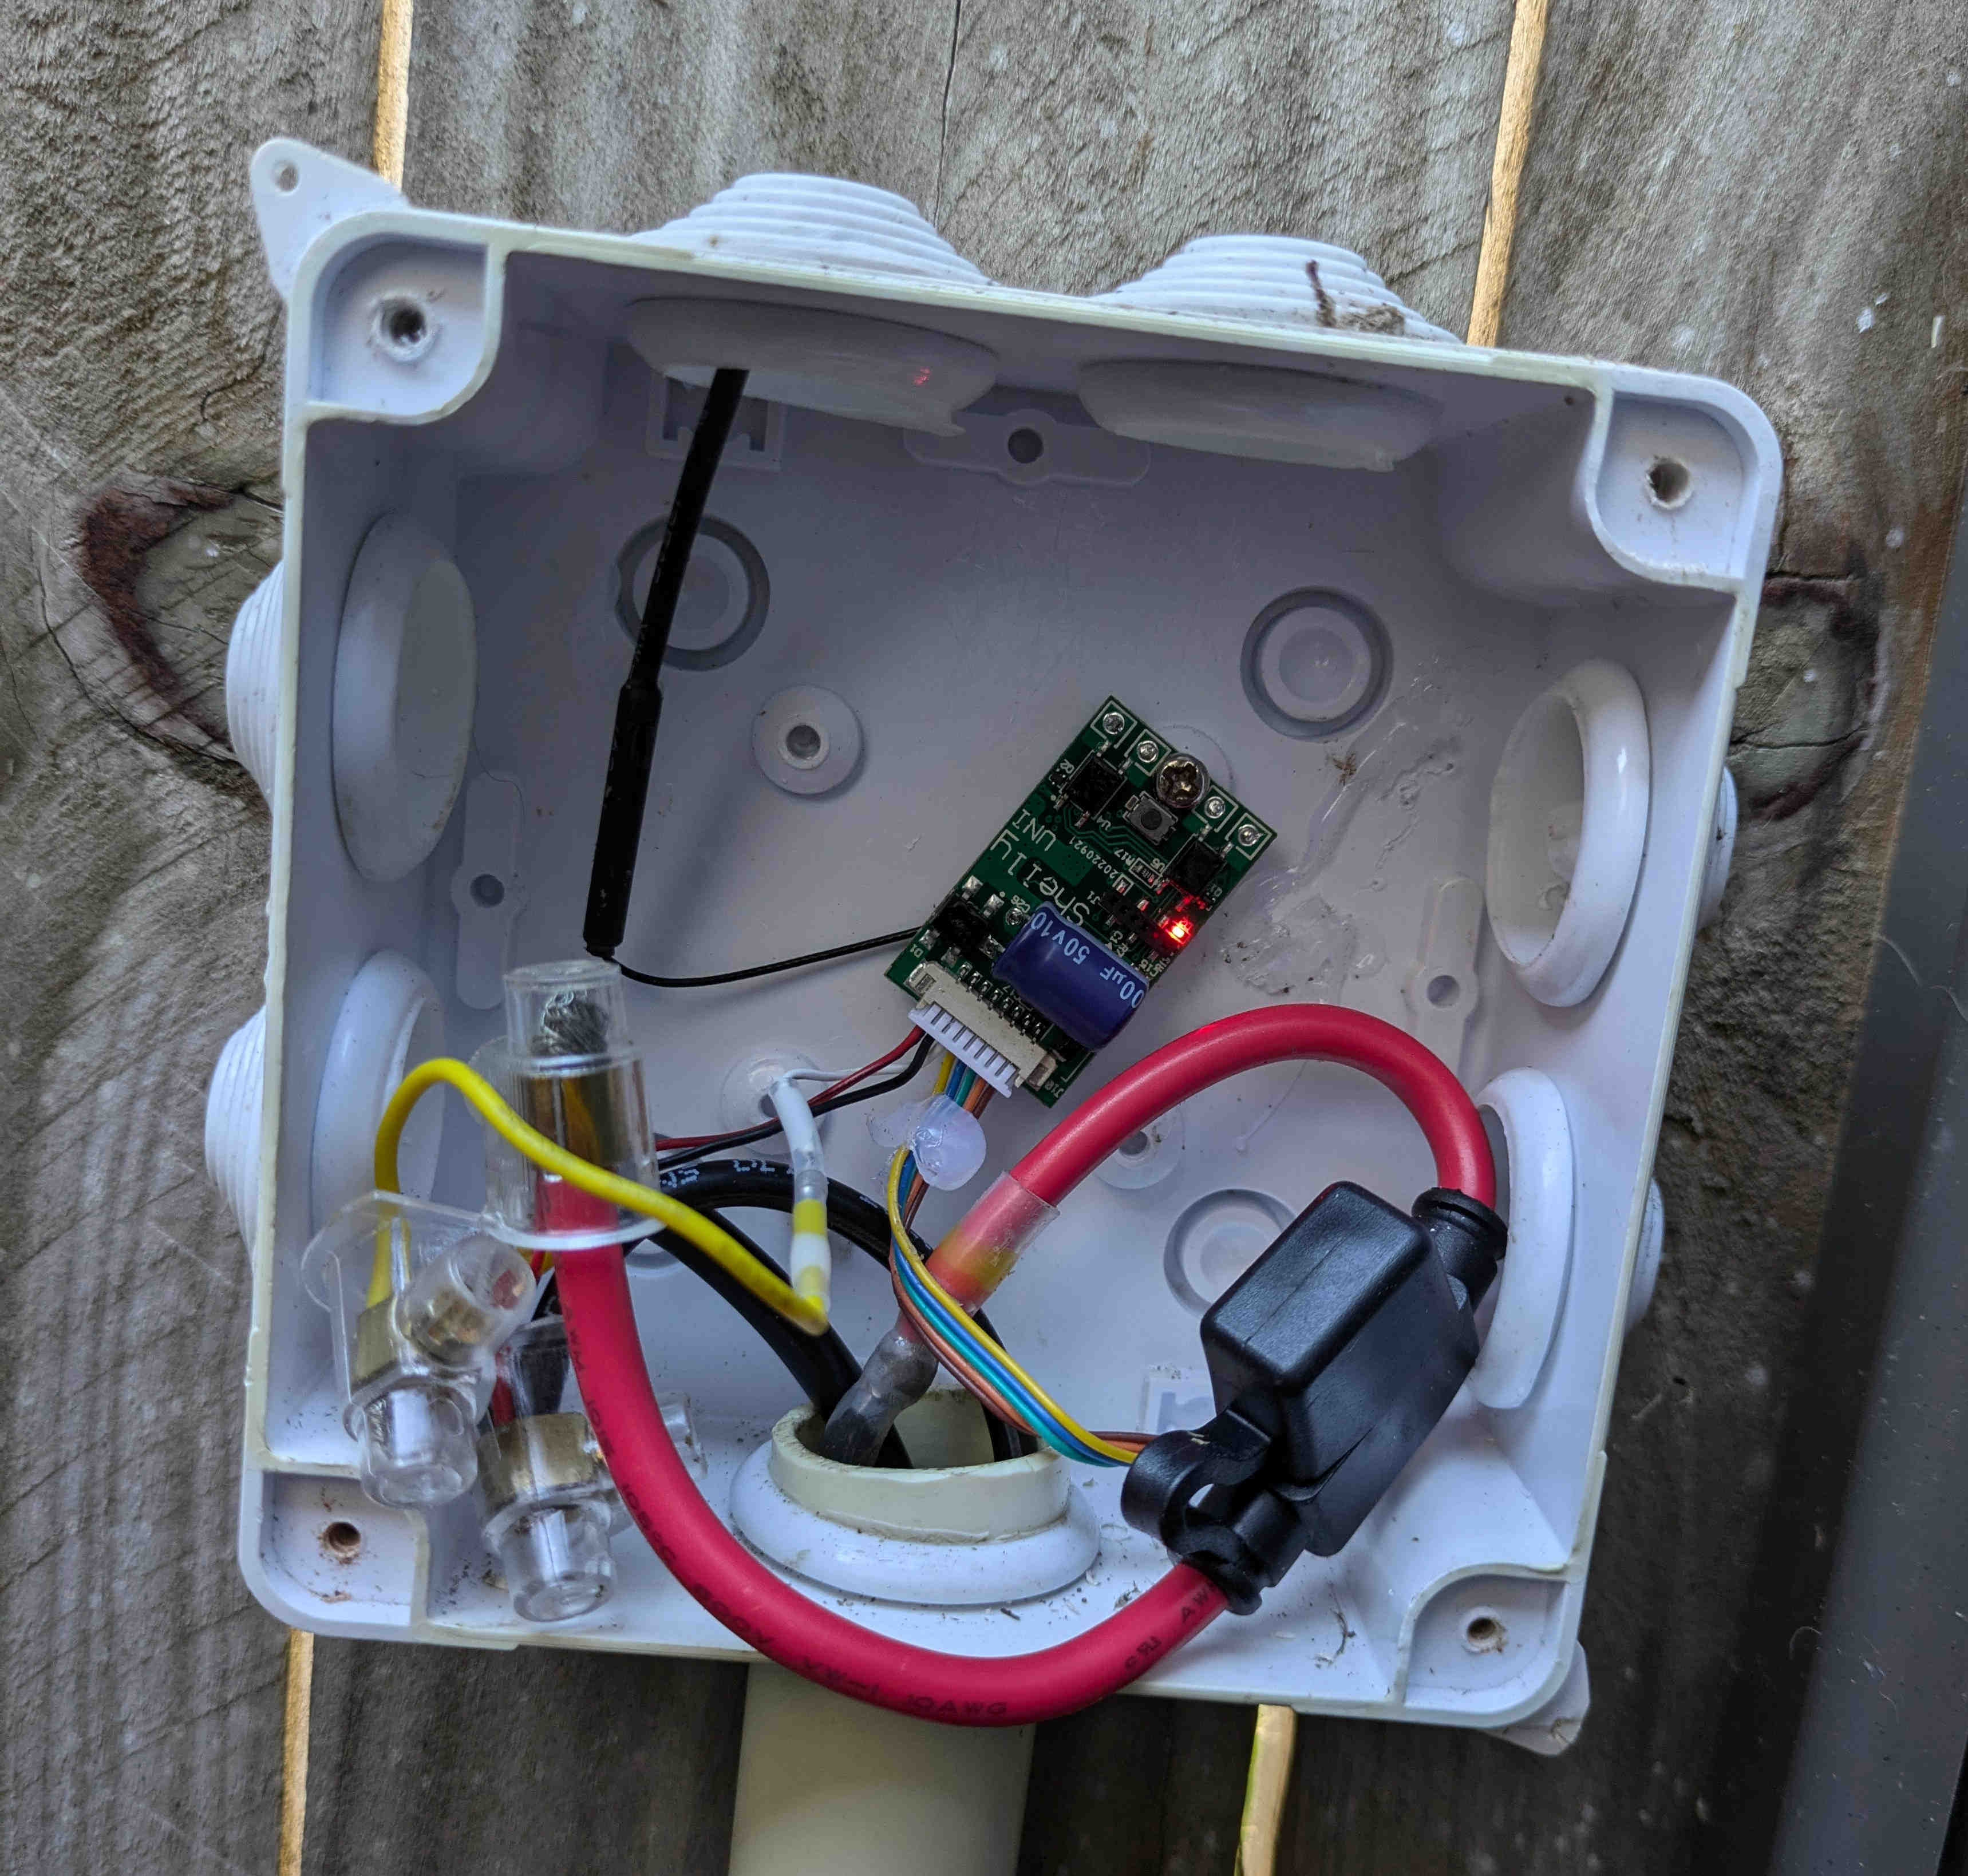
Excuse my seriously oversized wires, the existing cable for the water fountain pump that I reused and a inline fuse holder, one that I had laying around. Remember we’re keeping costs low here. Normally you would use matching guages but given this outdoor heavier gugage cable was already fed into the wall into the power source, I didn’t want to have to redo that. I used an inline fuse, as there is water involved and as we’re outside I did want that slight extra protection. I’ll look for something a little more appropriate on AliExpress when I get a chance.
The Uni comes with a Wi-Fi antenna, which again is really nice and makes the Wi-Fi signal fairly decent. The Uni also has a number of outputs (Out1 and Out2) where the screw is (in the install image above), which are not required and I removed them to make it slightly cleaner.
Otherwise the wiring itself is staight forward:
- The
posconnects to the red wire on the Shelly and the positive wire on the PNP induction sensor - The
negconnects to the black wire on the Shelly and the neg wire on the induction sensor. - The
whitewire on the Shelly is theanalog inand connects to the sensor wire on the PNP sensor. We’ll use that for sensing a voltage present.
In terms of the PNP sensor, mine was:
- Brown = positive
- Ble = negative
- Black = sensor
It’s best to double check, as depending on where and what shop you buy from sometimes I have found this not always to be the case and the pos/neg has been swapped.
Depending on where you are installing, i.e. outside, it can be far easier just to test inside with all the cable and then fix in a comfortable environemnt instead of up against two fences near some rubbish bins. Even without a Wi-Fi connection, the light on top of the sensor (if it has one) should turn on when within proxminity of some metal.
For the cable I just used a 3-core cable again bought from AliExpress. This allows me to run both pos and neg to the sensor and then receive the return signal all with one cable.
The box itself is just a terminal box with a seal, nothing fancy. It sits behind my garbage bins and isn’t really exposed to the elements.
Shelly Setup
Obviously step 1 here is to connect the Shelly Uni to your home network. It’s very straight forward, connect to the Shelly like you would your home wifi, and then go to “192.168.33.1” in the web browser. Login (admin/shelly) and then in Wi-Fi settings add your home WiFi network.
With everything connected and powered, the dashboard will show something like:
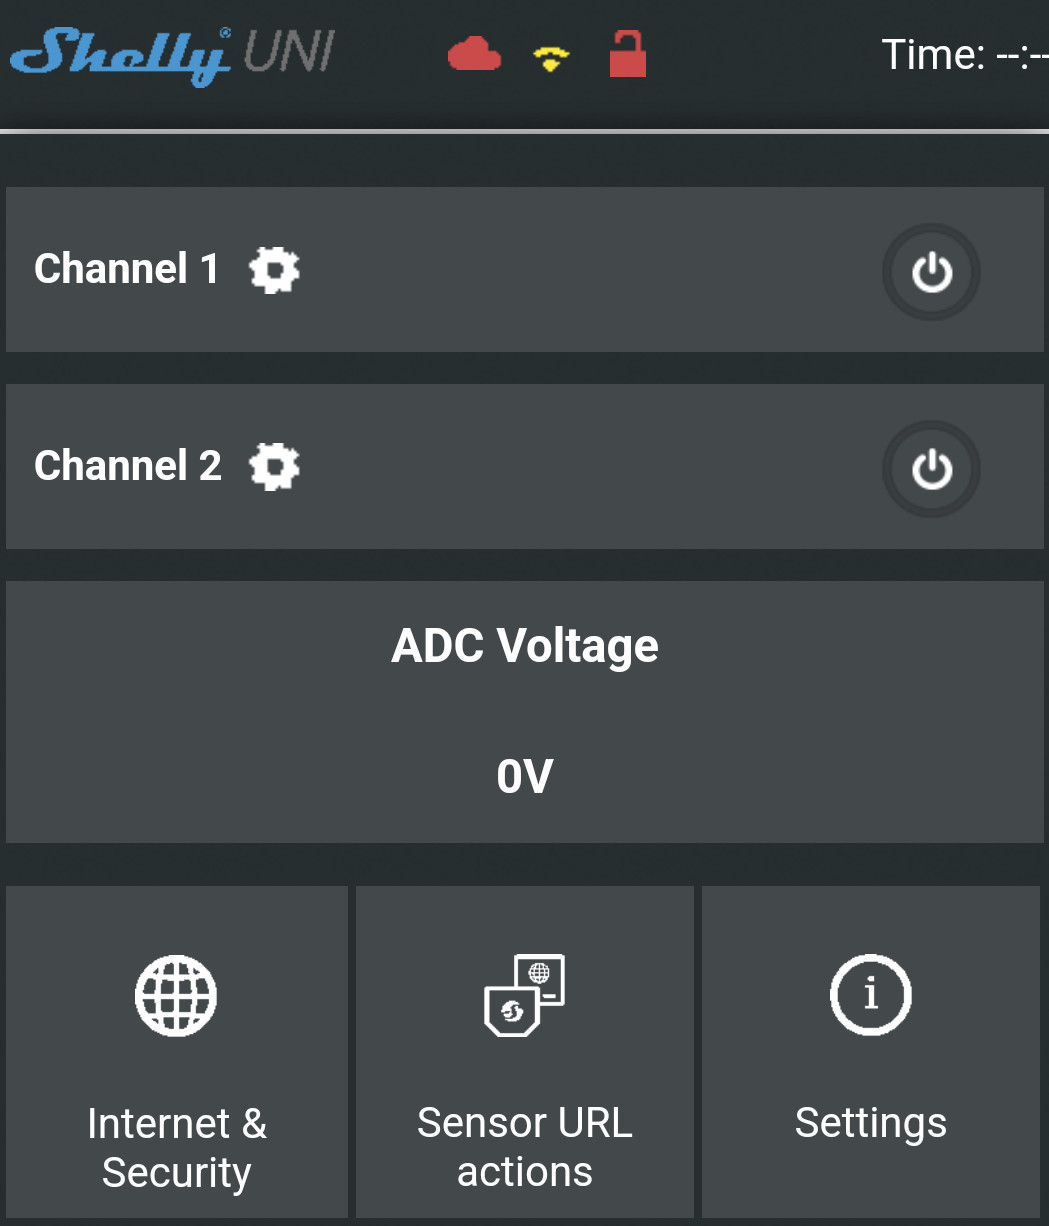
Here the metal disc is not under the sensor, but when it is:
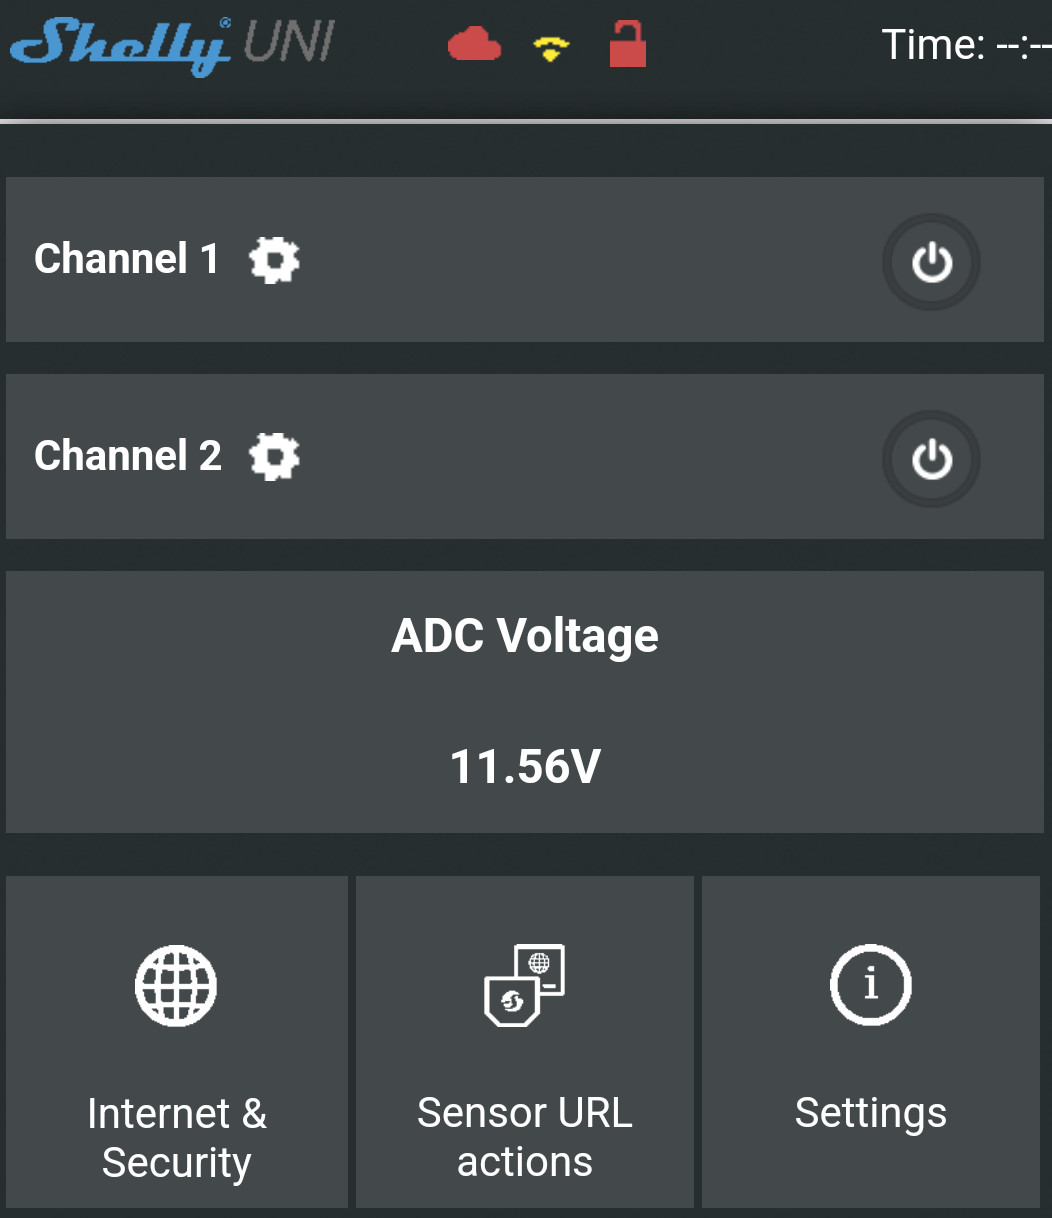
Due to how far away my water meter actually is from the shell there is some voltage drop here, meaning that when the PNP sensor is “On” the Shelly isn’t receiving a signal at the full 12v. But it is fairly constant at the ~11.5v and we can work with that in Home Assistant.
Setup in Home Assistant
If you don’t know what Home Assistant is, I’ll leave that to their website, but otherwise the device should be automatically detected (or just add it in intergrations). Once added you will see the familar ADC reading:

As per the instructions at HA shelly I did have to enable CoIoT to be able to communicate succesfully.
The next bit is fiddly, as we need a switch, automation and some sensors to hook all this up.
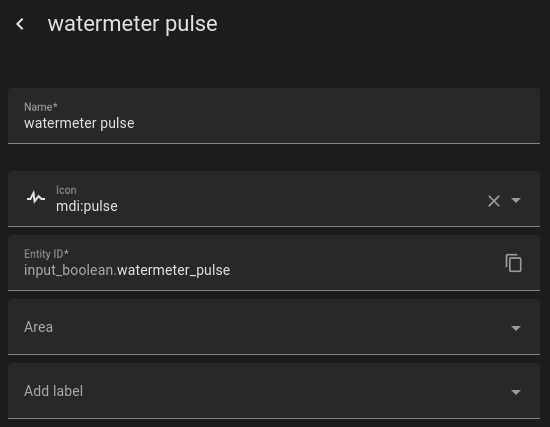
The input_boolean is just to help toggle on and off:
The real work occurs in the automation:
alias: generate watermeter pulse
description: ""
trigger:
  - platform: numeric_state
    entity_id:
      - sensor.watermeter_adc
    above: 5
condition: []
action:
  - service: input_boolean.toggle
    metadata: {}
    data: {}
    target:
      entity_id: input_boolean.watermeter_pulse
  - delay:
      hours: 0
      minutes: 0
      seconds: 0
      milliseconds: 100
  - service: input_boolean.toggle
    metadata: {}
    data: {}
    target:
      entity_id: input_boolean.watermeter_pulse
mode: single
What’s happening here is:
- When the voltage is above 5v trigger
- Toggle the input boolen on and off with a 100ms delay
This should account for when the disc sits under the sensor, reading a voltage for an extended period of time, as this should only trigger when the voltage moves above 6v once.
From here we require some a sensor to watch and count when the input_boolen toggles such as:
platform: history_stats
name: "Watermeter Pulses Hourly"
entity_id: input_boolean.watermeter_pulse
state: "on"
type: count
start: ""
end: ""
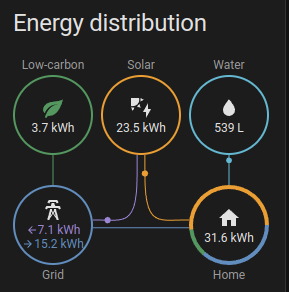
The Watermeter Liters Hourly can be set in the energy dashboard of Home Assistant to help generate some nice distribution graphics:
Or use it in your dashboard chips:

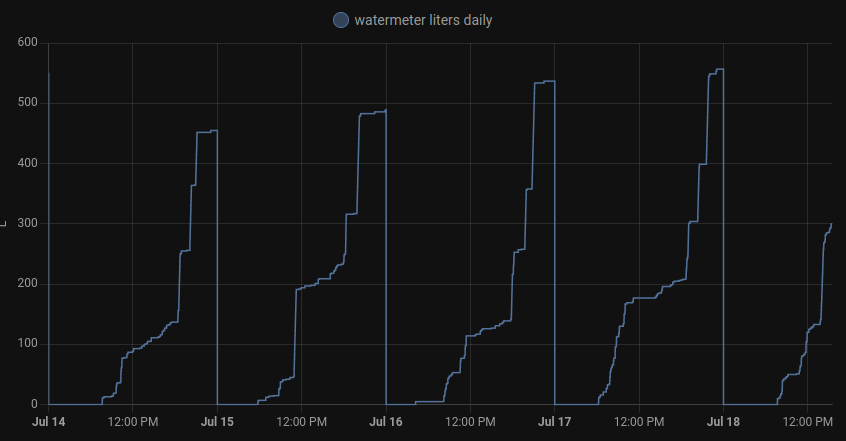
Or just view some fancy graphs:
And that’s it!
Shout out
This is certainly not a new idea here are some of the fantastic resources I used initially to set things up: